Modeling Moon Phases
- Lesson Plan
- Video
- Feedback Form
Why does the moon change shape throughout the month? By modeling a moon rotating around yourself as Earth, students learn moon phases in a kinesthetic fashion that for many will finally make sense.
1.2
Earth and Space Science. Students will gain an understanding of Earth and Space Science through the study of earth materials, celestial movement, and weather.
2.2.2
Observe and record recognizable objects and patterns in the night sky.
3.1.1
Describe the appearance of Earth and the moon.
3.1.2
Describe the movement of Earth and the moon and the apparent movement of other bodies through the sky.
Materials
- 1 Styrofoam ball for every student
- 1 pencil for every student
- A lamp with shade removed to represent the sun
- Lab Sheet if using (download below)
Do Ahead
- Darken your room before the activity. The darker the room the better
- If working with younger students, put the ball and pencil together before the activity.
- With younger grades invite volunteers to assist with the activity.
- Watch the teacher video on the video tab.
- Decide wether you will use the Lab Sheet. Modify it to meet your classrooms needs.
- Review prior moon knowledge with students. You may want to use videos on the video tab and / or fill out sheet 1 of the Lab sheet before the activity as a classroom or individually.
Directions
- Darken the room—the darker, the better. Give each student a pencil and a foam ball. Explain that the foam ball, stuck on the end of a pencil, is a model of the Moon; the lamp is a model of the Sun; and the students’ heads represent Earth. Before the guided activity below, give students time to explore the model and test different ideas about what causes Moon phases. Next, guide students through the following activity to model how the Moon changes shape.
- With their faces toward the lamp, students hold the balls slightly above their heads so that they have to look up a little to see them. In this position, students cannot see the lighted side of the ball. This is called a new Moon.
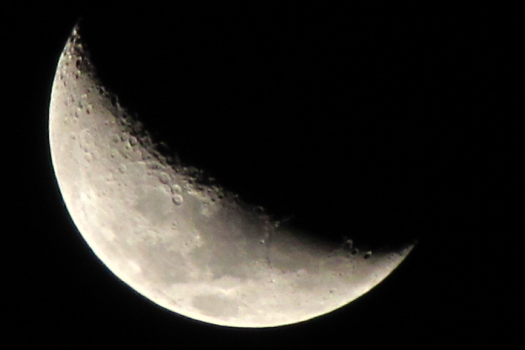
- Tell students to turn their bodies slightly to the left while still looking at the ball and holding it a little above their heads. They should turn until they see a tiny sliver of the lighted side—a crescent Moon.
- Ask- Where does the Moon’s light come from? (The light is coming from the Sun and is reflected off the Moon.) Some people think that the Moon phases are caused by the Earth’s shadow. How does this model disprove that misconception? (The shadow of my head, which represents the Earth, is nowhere near the Moon in this position. It is behind me.)
- Instruct the students to keep turning to the left and soon they will see more of the lighted half of the ball. This is called a quarter Moon.
- Have them turn a little more and almost all of the ball will be lit. This is called a gibbous Moon.
- Students can keep turning until they see all the lighted half of the ball. This is a full Moon.
- As students continue to turn in the same direction, they will see less and less of the lighted part of the ball. First they will see a gibbous Moon, then a quarter Moon, then a thin crescent Moon, and finally they will be back to the new Moon.
- Tell students that the shapes they have observed in this activity are called the Moon phases.
- Have students go through the orbit several times. Ask them to chorally respond with the name of each phase as it is modeled.
- Point out that no matter where they are in the Moon’s orbit, half of the Moon is always lighted by the Sun. Sometimes we see the whole lighted half from Earth (full Moon), sometimes we see almost all of the lighted half (Gibbous Moon), sometimes we see half of the lighted half (quarter Moon), sometimes we see only see a tiny sliver of the lighted side (crescent Moon), and sometimes we can’t see any of the lighted half (new Moon). The portion we see from Earth depends on where the Moon is in its orbit around the Earth.
See printable version for Extensions and Teacher Background Information.
This lesson plan is adapted from:
Moon Modeling- http://www.nsta.org/publications/press/extras/moon.aspx
Copyright © 2014. Next Time You See the Moon. Published by NSTA Press.
| Attachment | Size |
|---|---|
| 274.12 KB |
| Attachment | Size |
|---|---|
| 68.07 KB |
We highly recommend you watch this video before doing the activity with your students. This video is not for your students, it is a great demonstration of how the teacher will lead the activity.
This is a great introductory video to the activity for younger grades. You may want to show this video and have students fill out page 1 of the Lab sheet before doing the activity.
This is a great short video for older grades specifically on moon phases and follows the activity very well.
Another good video for older grades on moon phases as well as rotation.
This video explains why we always see one side of the Moon. It is great for older students and the extension activity.

