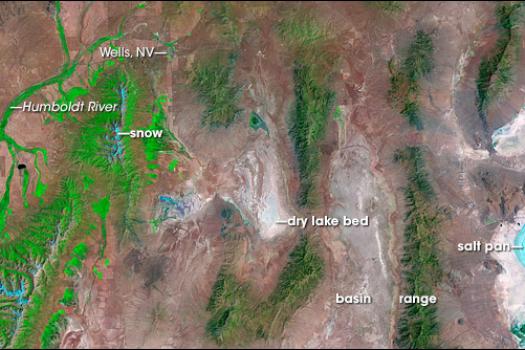
Great Basin Watershed
- Lesson Plan
- Video
- Feedback Form
NASAA
Description:
Students will create models to understand the hydrosphere, biosphere, atmosphere, and geosphere which make up the Great Basin watershed.
Time:
40-50 minutes
Grade Level:
4, 5
Next Generation Science Standards:
Utah Core Standards:
4.1
Students will understand that water changes state as it moves through the water cycle.
4.5.1
Describe the physical characteristics of Utah's wetlands, forests, and deserts.
5.2
Students will understand that volcanoes, earthquakes, uplift, weathering, and erosion reshape Earth's surface.
5.2.1
Describe how weathering and erosion change the Earth's surface.
5.2.3
Relate the building up and breaking down of Earth's surface over time to the various physical land features.
Materials
- 1 clear cup
- 1 large map of the Great Basin Watershed
- 10 small maps of either Nevada or Utah depending on which state you live in
- 10 sets of markers
- 1 roll of freezer paper
- 1 spray bottle
- 10 permanent markers
- 10 dry erase markers
- Rainbow sprinkles (Pollution extension)
Intro to the Activity
- Turn on the faucet and fill up a clear cup of water. Look at it and ask the class what makes the water so important. Have students “think pair share” various reasons water is important to them.
- After a minute of discussion have the class share a few of their responses.
- Ask the students:
- Where did the water come from? Many students will quickly respond with something such as the faucet or the sink. Have them dig deeper.
- Where did the water coming out of the faucet come from? Encourage students to think deeply about where their water comes from.
Pre-activity Background Information
- Explain to students that today we want to find where our water comes from.
- Provide small maps to each student. Identify where you are located. Locate popular features such as water and mountains in either Utah or Nevada. Allow students to observe these features around them and discuss if you can see any from where you are.
- Using a dry-erase marker have students trace all the water near them which could provide them the water sitting in a cup at the front of the classroom.
- Walk around as the students work. Ask the following questions:
- Where do you think the river is flowing?
- What can we add to the map to show the direction the water is moving? (Have the students add arrows to show the direction of flow.
- Where did the river start?
- Where does the river end?
- Discuss why rivers and streams flow in this direction. Students should understand that water flows downhill. Teach them that rivers start at a high elevation and drain into a watershed. A watershed is an area of land where all the water drains to the same place. What natural features would cause water to flow to a certain area? (Mountains, canyons, etc).
- Use the maps to identify where the water drains into our watershed. Our watershed is called the Great Basin watershed. That means that all water (from rain) stays in this immediate area. Usually, where does water from rivers go? (The ocean). Discuss why our water does not go to the Pacific Ocean. Students should understand that the geography of the area (hills and mountain ranges) prevents water from traveling to the ocean.
- The Great Basin watershed is part of a hydrosphere. Write hydrosphere on the board and explain to the students that hydro means water. A Hydrosphere is made of all the water on earth (lakes, rivers, oceans, streams, etc). Have the students look at their maps and make a list of types of water in the watershed.
- Introduce the term biosphere. Write it next to “hydrosphere” on the board. Explain that the bio means life. It is all biological or living components of the earth. Discuss examples (plants, animals, peoples, bacteria, etc). Have the students brainstorm examples of a biosphere in Great Basin (Owls, Jackrabbits, cottonwood trees, etc) and write them on the board.
- Introduce the term geosphere. Underline geo and explain it means ground. Ask students to come up with ideas of what is included in this sphere. Examples: Rocks, minerals, soil, etc. Add it to the chard on the board.
- Write the terms atmosphere. Underline the prefix atmo and explain that it means air.
- Have the students look at all the lists and things of a few ways about how all 4 terms are related to each other. This will set up all background knowledge students will need for the activity.
|
Hydrosphere |
Biosphere |
Geosphere |
Atmosphere |
|
|
|
|
Activity Directions
- Students will now make a model of a watershed using freezer paper and markers. Students will work in pairs. Each pair will get a foot-long sheet of freezer paper. Have them lightly crumple their papers and sit on a desk or flat surface. They must not flatten their models for this activity
- Ask the students to identify each of the 4 words they learned in the previous discussion. When they can, students should label them with a permanent marker. Hydrosphere: they may draw arrows where they believe lakes and rivers will be formed. Geosphere: they may point to the mountains. Atmosphere: the air above their models. Biosphere: they may choose a few animals which they would like to live in their model. Encourage students to come to the conclusion that most plants and animals live close to a water source.
- After the students label their models student should discuss and answer the following questions on their worksheet:
- Where will the water in the rivers flow to?
- How many watersheds do you think you have in your model?
- Why do you think this river would be connected to a lake?
- After the students have completed their models, explain that you will add some precipitation (rain) from the atmosphere to their models. Walk around and mist spray the models as the students observe what happens.
- Give the students a few minutes to walk around and see what happened to all the models.
- Discuses and record on the worksheet observations about the interactions of the hydrosphere, biosphere, atmosphere, and geosphere.
- The geosphere (mountains) helped guide where the hydrophores (lakes and rivers) were located.
- The biosphere is connected with the hydrosphere because the plants and animals would need the water.
- The atmosphere helped bring more water to the watershed.
Pollution Extension
- Using the same model as the activity, have students make the top of one of their mountains more prominent and slightly flat on top. Make sure the mountain top is relatively dry.
- Place 2-3 rainbow sprinkles at the top of that mountain. Explain that these sprinkles represent pollution. What kind of pollution could the sprinkles represent? (Litter, plastic pollution, radioactive contamination, soil contamination, water pollution, etc.)
- Add more precipitation from the atmosphere to their models by re-misting the models.
- Give the students a few minutes to walk around and see what happened to all the models.
- Discusses how pollution from the mountain travels to effects the other biospheres.
- The pollution from the mountain was carried through rivers and streams into the hydrosphere.
- The polluted water seeped through the ground into the geospheres.
- Because pollution is now in the hydrosphere, it may be evaporated back into the atmosphere. Then sometimes if the pollution is bad enough, acid rain falls from the sky during a rain shower.
- The animals and plants in the biosphere now drink the polluted water. It is toxic to them and it can kill them.
- Discuss and record what might happen if the pollution got into our Great Basin Watershed.
| Attachment | Size |
|---|---|
| 21.01 MB | |
| 221.37 KB |

